Thursday, December 27, 2007

World Peace Cookies

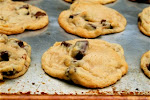
Before heading out on our eight-day road trip to San Diego, I thought I'd share a recipe I've made three times this past week, a Dorie Greenspan recipe for a cookie created by pastry chef Pierre Hermé. For the past year, a neighbor of mine has been on the quest for a good double-chocolate cookie recipe, and when I read the description for these "world peace" cookies on Smitten Kitchen, I had to try them myself.

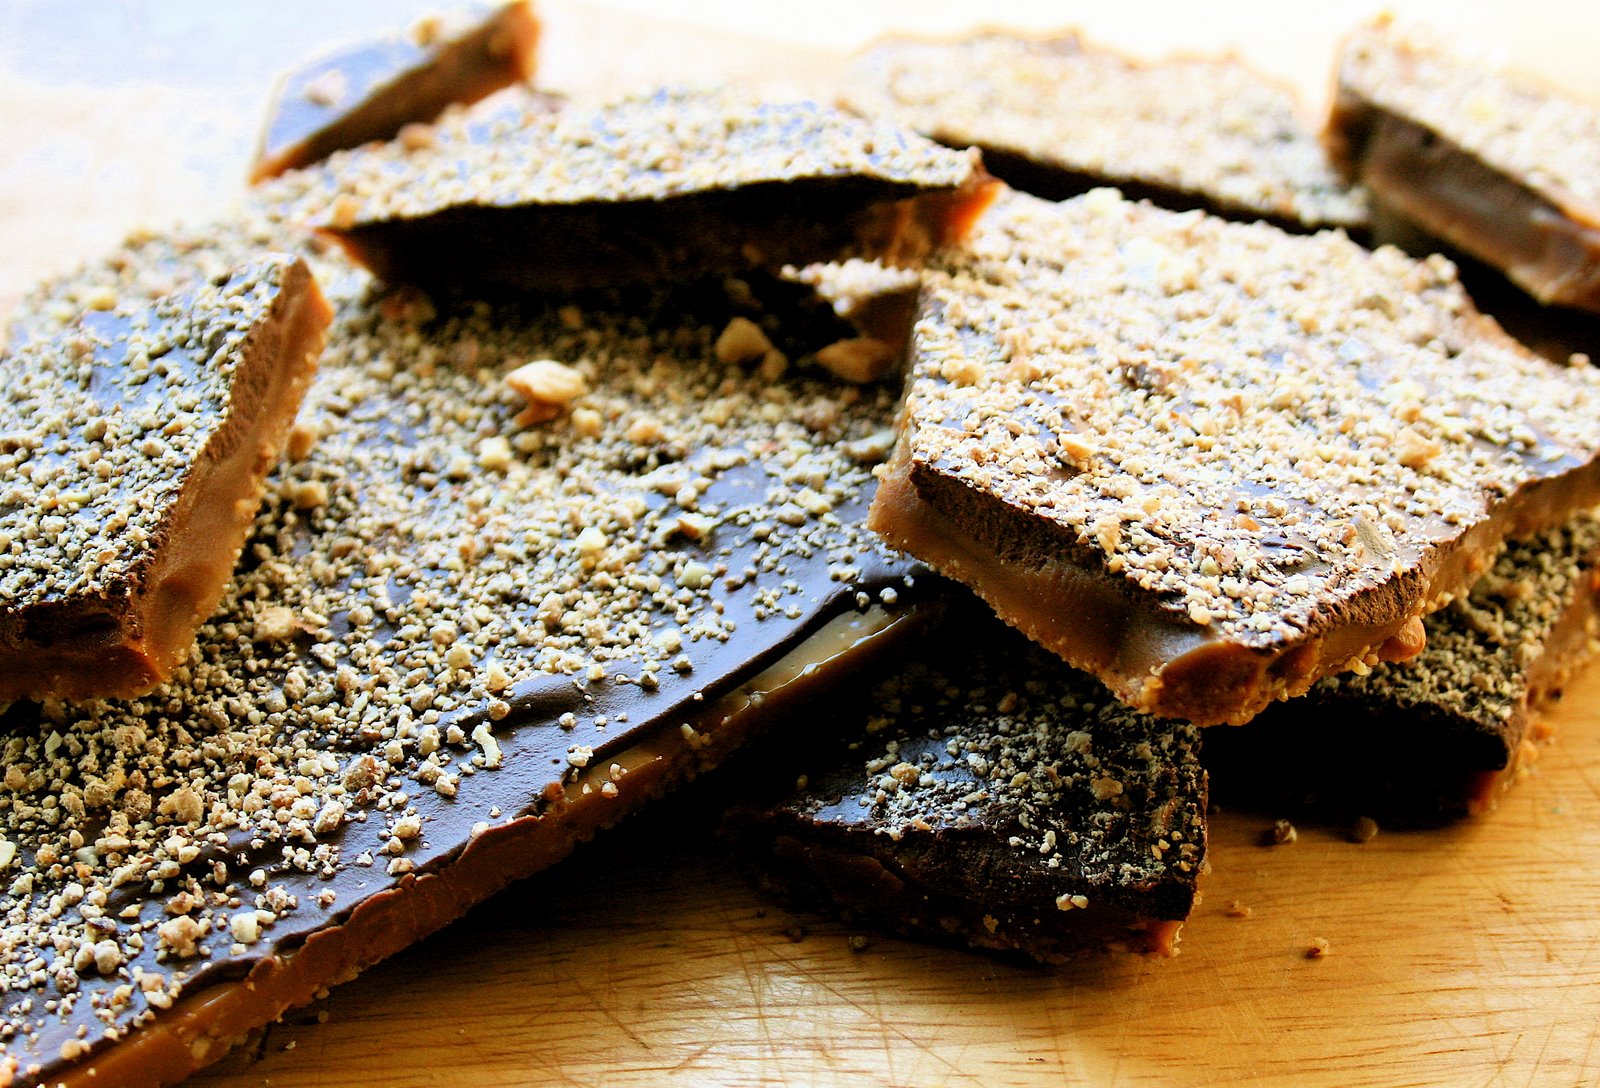
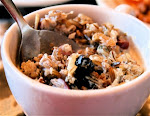
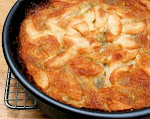
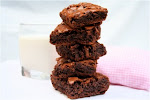
And the first batch I made looked and tasted just as described: midnight-dark in color, buttery-rich in taste, sandy-textured, chocolaty, salty ... delicious! When I made them a second and third time, however, the cookies came out completely differently — thin and crisp without that sandy, grown-up character of the first batch. Still delectable, just different. Very strange. I can't explain the difference.

I have made some notes: For the first batch, I used a stand mixer; for the following two, I used a hand-held mixer. For the first batch I used parchment paper; for the following two I used a Silpat. For the first batch I used mini chocolate chips; for the second two, I used chopped bittersweet chocolate. Using Dutch process cocoa versus unsweetened cocoa powder doesn't seem to make a difference — I used Dutch process for the second batch and unsweetened for the third, and the two cookies came out nearly identical. Having the oven temperature at 325ºF, as described, seems to be important: The third batch of cookies spread less than the second batch of cookies, which baked at a higher temperature.

So, I'm a little perplexed, but nonetheless believe the recipe to be a good one. Incidentally, in her book Baking From My Home To Yours (Houghton Mifflin Company, 2006), Dorie Greenspan explains why she calls these chocolaty delights "world peace" cookies: A neighbor of hers, Richard Gold, believes a daily dose of these cookies is all that is needed to ensure planetary peace and happiness.

Adapted from Dorie Greenspan’s recipe for Korova Cookies
Also known as “World Peace” cookies
Yield = 18

1¼ C. all-purpose flour

1/3 C. unsweetened cocoa powder

½ tsp. baking soda

1 stick plus 3 tablespoons (11 tablespoons) unsalted butter, at room temperature

2/3 C. (packed) light brown sugar

¼ C. sugar

1 tsp. kosher salt or ½ tsp. fleur de sel or ¼ tsp. fine sea salt

1 tsp. vanilla extract

5 oz. bittersweet chocolate, chopped into chips, or a generous ¾ C. store-bought mini chocolate chips

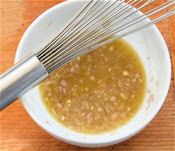
Whisk the flour, cocoa and baking soda together.

Working with a stand mixer fitted with a paddle attachment, or with a hand mixer in a large bowl, beat the butter on medium speed until soft and creamy. Add both sugars, the salt and vanilla extract and beat for 2 minutes more.

Turn off the mixer. Pour in the flour, and mix just until the flour disappears into the dough — for the best texture, work the dough as little as possible once the flour is added, and don’t be concerned if the dough looks a little crumbly. Toss in the chocolate pieces and mix only to incorporate.

Turn the dough out onto a work surface, gather it together and divide it in half. Working with one half at a time, shape the dough into logs that are 1½ inches in diameter. Wrap the logs in plastic wrap and refrigerate them for at least 3 hours. (The dough can be refrigerated for up to 3 days or frozen in 1-ounce portions for up to 2 months. If you’ve frozen the dough, you needn’t defrost it before baking — just bake the cookies 1 minute longer.)

Center a rack in the oven and preheat the oven to 325º F. Line two baking sheets with parchment or silicone mats.

Working with a sharp thin knife, slice the logs into rounds that are ½-inch thick or that weigh exactly 1 ounce. (The rounds are likely to crack as you’re cutting them — don’t be concerned, just squeeze the bits back onto each cookie.) Arrange six rounds on a baking sheets, leaving about one inch between each round.

Bake the cookies one sheet at a time for 12 minutes — they won’t look done, nor will they be firm. Transfer the baking sheet to a cooling rack and let the cookies rest until they are only just warm, at which point you can serve them or let them reach room temperature.

Serve with milk after dinner or with morning coffee.

Thursday, December 20, 2007

Boozy Chocolate Truffles

I am currently sitting on the floor of my barren living room, on a carpet strewn with random bobby pins, pen caps and Styrofoam packing peanuts. Though no furniture remains, I'm hanging out in this dust-bunny-filled corner, drawn by my Comcast modem, still connected despite all the chaos. The movers, who have been working nonstop since 8 this morning, have about an hour — or so I'm told — more of packing to complete. I still cannot believe the truck parked outside 754 S. 10th St. will be on its way to California by the end of the day.

Surprisingly, the day has gone smoothly. My sole concern now centers around the very large Tupperware sitting in my refrigerator filled to the brim with chocolate truffles. I went a little overboard this year, making over 300, in an effort to use up all the remaining chocolate in my refrigerator and pantry before the move. I emptied nearly every bottle of booze in my possession as well — Grand Marnier, Brandy, Marsala, even a splash of Sake. Sounds gross, I know, but a trustworthy friend enthusiastically described these as my "most impressive feat yet." Now, I'm concerned because with nothing but a half-full jar of Sriracha, a few bottles of beer, and a tub of peanut butter remaining in my fridge, I could make a considerable dent in this chocolate stash tonight.

I have been experimenting with this Alton Brown recipe for almost a year now. These chocolaty confections have morphed from Derby Day Bourbon balls coated with chopped pecans and confectioners' sugar to trendy dark chocolate truffles topped with gray salt and now back to their original incarnation, filled with booze, doused in cocoa.

Boozy Chocolate Truffles
Yield 35

10 oz. bittersweet chocolate, chopped
3 tablespoons unsalted butter
½ cup heavy cream
1 tablespoon light corn syrup
¼ teaspoon kosher salt
¼ cup Grand Marnier, Brandy, Port, Marsala, whatever (seriously)
12 oz candy-making chocolate disks (dark), Merckens brand works well or Nuts to You's dark chocolate disks
½ cup Dutch process cocoa powder

Place the bittersweet chocolate and the butter in a microwave-safe bowl and heat for 30-60 seconds, stirring after the first 30 seconds. Alternatively, melt chocolate and butter together in a bowl set over (not touching) gently simmering water.

In a small sauté pan or saucepan, heat cream, corn syrup and salt until simmering. Pour over melted chocolate mixture and let stand 1-2 minutes. With a spatula gently stir mixture until evenly blended. Pour the alcohol into the chocolate mixture and stir. Pour mixture into an 8x8 inch baking dish, preferably glass or Pyrex. Let chill in the refrigerator for at least one hour or overnight.

Line a cookie sheet with parchment paper. Using a truffle scoop (also called a #100 scoop) or a melon baller, gently drag the balled end across the surface of the chocolate. Release the ball of chocolate onto the cookie sheet and repeat until all of the chocolate has been scooped. These balls should look slightly mishapen. Let chill in the refrigerator for at least another hour.

Place the coating chocolate in a large stainless-steel bowl. Fill a pot large enough to accomodate the bowl with a few inches of water. Bring to a boil, then reduce to a very gentle simmer and place the bowl with chocolate over the pot being sure that the bottom of the bowl is not touching the water. After a few minutes, stir the chocolate with a heat-proof spatula.

Place the cocoa powder in a shallow vessel—a large Tupperware works well. Have a clean Tupperware ready for the finished truffles.

When the chocolate is smooth and melted, remove the bowl from the heat. Remove the chocolate balls from the refrigerator. Place a large stainless-steel spoon in the bowl and using the spatula push chocolate into the spoon to fill. Working one at a time, place one ball into the chocolate-filled spoon. Quickly coat the ball using a small spoon or fork, then transfer to the cocoa powder. Repeat with five or six and let sit for a minute. Gently shake the vessel back and forth until the truffles are coated, then transfer to the clean vessel.

Note: Toward the end of this coating process, you may need to place the bowl back over the water to gently warm the chocolate again so it more easily coats the chocolates. Just follow the same procedure as above—the key is to melt the chocolate slowly and to keep moisture out of the inside of the bowl. Keep the un-dipped chocolates cool in the refrigerator while you reheat the chocolate.

Once all of the truffles are coated, store in the refrigerator until ready to serve. If you prefer to eat them at room temperature, remove them from the refrigerator one hour prior to serving.

Note: After the chocolates have chilled in the refrigerator for a few hours and are firm, taste one. If the cocoa-powder coating is too strong, try this: Place five or six in a strainer and shake until enough of the coating comes off.

Note: You may have left over cocoa powder and coating chocolate. You can store the remaining coating chocolate in the refrigerator and use for another project or use in a recipe for chocolate sauce or hot cocoa. The remaining cocoa powder can also be saved for hot cocoa.

Sunday, December 16, 2007

Homemade Marshmallows

Every so often the Food Network offers some really good ideas. Last Sunday, I watched Tyler Florence make marshmallows, a food I never thought I would venture to make from scratch. But after seeing the two egg whites whip in the stand mixer until they tripled in size — until they nearly spilled out of the mixer — I had to try for myself. Plus, he packaged them in a cellophane bag tied with a festive ribbon and nestled the pouch into a basket with a jar of hot cocoa mix, his idea for a wonderful homemade Christmas gift. After tasting one of these sugary confections, I couldn't agree more.

Homemade Marshmallows: Worth The Trouble?
The Bulletin, Friday December 14, 2007

Once a word used exclusively to describe jewelry, furniture and model ships, "handcrafted" now labels breads, chocolates and countless other artisan products. Even marshmallows now don a handcrafted tag. Indeed, with bags of 20 white square puffs selling for nearly $20, marshmallows have become haute cuisine, the goods sold at upscale kitchenware stores and gourmet-food shops.

But making marshmallows at home is surprisingly easy, requiring few ingredients including two egg whites, which triple in volume when whipped, creating a white billowing cloud that nearly spills out of the stand mixer. Now, apart from witnessing the magic that happens in the mixing bowl, why would anyone venture to make marshmallows at home? It's a good question, one more difficult to answer than similar inquiries regarding homemade bread and chicken stock.

But like all questions involving mass-produced products, a taste of the real stuff can convert any skeptic. These sugary, homemade confections melt into hot cocoa, creating a rich, smooth layer unmatched by any Jet-puffed, Kraft product.

Homemade Marshmallows:
Adapted from Tyler Florence

This recipe requires the use of a stand mixer.
3 tablespoons powdered gelatin
2 cups cold water
2 cups sugar
2 egg whites
2 cups confectioners' sugar, sifted, plus more for dusting pan and marshmallows

In a medium sized saucepan soak the gelatin in the cold water. After the gelatin has softened, about 10 minutes, add the regular sugar, and gently dissolve over low heat, another 8 minutes. Remove from the heat and allow to cool to room temperature.

In a mixer, beat the egg whites until stiff peaks form. Fold in the sifted confectioners' sugar. While the mixer is on low, slowly pour in the cooled gelatin mixture. Increase the speed and beat until white and thick. The volume should double (or triple) in size and should form between soft and firm peaks. (When the mixture fills nearly the entire bowl, it is ready.)

Coat bottom and all sides of a 9-by-13-inch baking dish with confectioners' sugar. Pour marshmallow mixture in and top with more sifted confectioners' sugar. Leave out overnight or for at least 3 hours to set. The marshmallow should be light and spongy when set.

Loosen marshmallow from edges of tray and invert onto a large cutting board. Use a large knife to cut the marshmallows into cubes. Sprinkle each piece with more confectioners' sugar.

Friday, December 14, 2007

French Onion Soup

So, I've found something else I'm going to miss about Philadelphia. On Monday, my sister and I met for lunch at Rouge where we enjoyed the crusty rolls served with sea salt-speckled butter and the French onion soup topped with Gruyère and provolone. These cheeses blister over garlic croutons insulating the delectable onion broth below. And the crusty bits clinging to all sides of the goblet-like bowls are irresistible.

While I can't say I'm a French onion soup connoisseur, I have ordered my fair share of this bistro classic, including five bowls this week alone, a spree that began last Saturday up in NYC. A.O.C., the adorable Greenwich Village restaurant where I sat with two friends for a few hours, set the standard, one so high I feared no place in Philly could equal. And for the most part, the soups I sampled confirmed my worries. At both Brasserie Perrier and Caribou Café, the soup had not been thoroughly heated before being topped with the crouton and cheese and thrown under the broiler. Both should have been sent back to the kitchen.

My weeklong onion-soup bender also inspired me to make my own batch, which to my surprise and delight was very simple. I opened Daniel Boulud's Café Boulud Cookbook, a book I have not used once, but has now piqued my interest. The success of French onion soup, says Mr. Boulud in his notes preceding the recipe, depends on cooking plenty of onions “very, very slowly until they are soft, sweet and caramel colored,” and deglazing with white wine, which adds the necessary “touch of acidity.”

My onions cooked for about an hour and I used a mix of Sherry and Madeira because I didn't have any white wine. I also used homemade chicken stock, which Mr. Boulud describes as “rarely the star player,” but whose “supporting role can elevate just about anything.” I would agree that a homemade chicken (or beef) stock makes all the difference in this soup.

While any ovenproof bowls will work, it's fun to eat this soup out of the traditional crocks. I found mine at Kitchen Kapers for $7.99 each. Fante's and the Philadelphia Bar & Restaurant supply shop at 5th and Bainbridge also sell these vessels.

French Onion Soup
Serves 6

3 tablespoons unsalted butter
2 pounds yellow or Spanish onions, peeled, trimmed and sliced thinly
1 clove garlic, minced
kosher salt
freshly ground black pepper
2 teaspoons all-purpose flour
1 cup dry white wine or Madeira or Sherry
Herb sachet: (2 sprigs Italian parsley, 2 sprigs thyme, 8 peppercorns and 1 bay leaf, tied together in a cheesecloth)
2 quarts homemade chicken stock
1 mini French baguette
2 cups Gruyère or Swiss cheese, coarsely grated
4 to 6 sprigs parsley, leaves finely chopped

In a large Dutch oven or soup pot, melt the butter over medium heat. Add the sliced onions and garlic to the pot, season with salt and pepper, and cook stirring regularly, until the onions are a deep caramel color, about 30 minutes to an hour.

Dust the onions with the flour and cook, stirring for about five minutes to toast the flour and rid it of its raw taste. Add the white wine and cook, stirring until the wine almost evaporates completely. This happens almost instantly.

Add the herb sachet, the stock and a pinch of salt. Bring to a boil, then lower the heat and let simmer 40 to 60 minutes.

Meanwhile, preheat the oven to 350ºF. Slice the baguette into one-inch thick rounds. Place rounds on a baking sheet, and toast in the oven until lightly golden, about 10 minutes. Remove pan from the oven and let cool.

Preheat the broiler. Taste the soup. Add more salt and pepper if necessary. Remove the sachet and discard. Ladle the soup into individual ovenproof serving bowls. Cover each with two baguette rounds. Top each generously with the grated cheese. Top each with a pinch of chopped parsley. Place bowls on a baking sheet and place under the broiler. Broil until the cheese melts. Serve immediately.

Homemade Chicken Stock
Yield = 1 gallon

4 lbs. of chicken legs
2 carrots, peeled, cut into large chunks
2 ribs celery, trimmed, cut into large chunks
2 medium onions, peeled and quartered
1 leek, trimmed, split lengthwise, and washed
1 bay leaf
1 teaspoon peppercorns
1 bunch Italian parsley

Place the chicken in a large stockpot. Cover with 2½ quarts of cold water and bring to a boil. Skim off scum that rises to the top. Simmer 10 minutes, skimming regularly.

Add the remaining ingredients to the pot and simmer gently for three hours, skimming as necessary. Drain the stock into a colander set over a bowl. Allow the solids to drain before discarding them. Strain stock again through a fine-mesh strainer. Transfer to storage containers and chill in the refrigerator over night.

The next day, scrape off any fat solidified at the top of the stock. Freeze stock indefinitely or keep in the refrigerator for four days.

Sunday, December 9, 2007

Roasted Brussels Sprouts

Recall my friends Kristin and Liz. You remember, the ones that went to town on the baklava and flatbread that night back at my apartment after an evening carousing in Old City this past August. Well, I had the pleasure of seeing them along with some other good friends this weekend up in NYC. Upon arriving, I presented Kristin, my host, with a block of fudge, the first batch I had ever made. The three of us chatted for awhile, but before long, Liz had convinced Kristin to unwrap the parchment paper and tuck in. This time, however, just a small taste sufficed — this fudge is rich, richer even than baklava.

They both inquired about how to make it, but as soon as I began explaining the "soft-ball stage," I had lost them. They very politely requested that I post some easier recipes every so often, ones with fewer steps and fewer ingredients. I've taken their suggestion to heart and am going to make an effort to post simple recipes more frequently, these roasted Brussels sprouts being the first of the series.

I suppose I should have asked my two friends if they like Brussels sprouts — people seem to either love or hate these little cabbages — but this recipe couldn't be simpler. So, Kristin and Liz, if you like Brussels sprouts, you'll love these, and I am confident you will have no trouble making them. And once you've mastered these simply roasted Brussels sprouts, you can dress them up with Fuji apples, cème fraîche and pistachios, as they were prepared last December at Alta, a tapas restaurant in the West Village.


Roasted Brussels Sprouts
Serves 3 to 4

1 lb. Brussels sprouts
olive oil
kosher salt
freshly ground pepper

Preheat the oven to 400ºF. Cut the rough end off each Brussels sprout and discard. Cut each sprout in half. Place on a rimmed baking sheet. Drizzle two to three tablespoons of olive oil over the top. Sprinkle to taste with salt and pepper. Toss mixture together until evenly coated with the flavorings. Roast for 15 to 20 minutes or until sprouts are knife tender and slightly charred.

Friday, December 7, 2007

Duncan Hines Yellow Cake Mix Baking Spree

I tend to avoid recipes that call for prepared cake mixes because, like my mother, I sometimes suffer from make-it-from-scratch syndrome. A recent trip to Williams Sonoma, however, inspired me to try a few new recipes, including one for pumpkin butter dessert bars, which I sampled at the store. Spiced with cinnamon, double-textured like a lemon bar, these pumpkin treats instantly won the affection of all who sampled them. The recipe calls for a jar of Muirhead pecan pumpkin butter, but any brand of pumpkin butter will do.

The other new recipe I tried was for quick apple kuchen. Of the three recipes posted here, I would say the kuchen tastes the most artificial, a sour cream glaze giving it an Entenmman's-like character. Best served warm with a cup of coffee, however, this kuchen is still delectable.

And my mother makes this rum bundt cake (pictured above) every year for the Greek New Year. The recipe calls for both a box of cake mix and a package of vanilla pudding. I've tried several times to re-create the recipe from scratch and have found that the original recipe produces the tastiest cake.

Here is an article from today's Bulletin:

The Secret's In The Box
The Bulletin, December 7, 2007

Three-hundred sixty-four days a year, my mother suffers from make-it-from-scratch syndrome. On her one day a year liberated from this affliction, she spends a few hours preparing a Greek New Year's cake (vasilopita), pulling from the pantry a box of Duncan Hines yellow cake mix and a box of instant vanilla pudding. She combines these two powders in a bowl, adds a considerable amount of rum - the secret, she says, to the cake's moist texture - and before long has produced a beautiful rum bundt cake, the dessert of choice for our annual coin-hiding, cake-cutting, Greek ritual.

Introducing this old WASP recipe into my mother's repertoire - one dominated by traditional Greek dishes like spanakopita and moussaka - was no easy task. My stepfather, the man responsible for accomplishing this feat many years ago, still gloats to this day.

Only after several attempts at making the cake from scratch (substituting for the powdered mixes a pound cake one time and a chiffon cake another) received unfavorable reviews, did my mother concede, vowing never to tinker with the recipe again, a pledge widely supported by the rest of the family. Moist and boozy with a sugary-buttery glaze, this cake - in its original incarnation - has been a favorite since its debut.

Although my adoration for the rum bundt cake has made me less skeptical than my mother of recipes calling for instant cake mixes, I still find myself calling home to consult the authority before opening the box. "Be sure to add vanilla extract or a splash of Bourbon," she always tells me, adding, "you need something to hide that artificial flavor." Rarely do I end up making the recipe.

A recent visit to Williams- Sonoma, however, unexpectedly inspired a prepared-mix baking spree, my arrival to the shop fortuitously coinciding with the presentation of a batch of freshly made pumpkin dessert bars. Spiced with cinnamon, double-textured like a lemon bar, these pumpkin treats instantly won the affection of all who sampled them. Much to my surprise, the recipe called for a box of yellow cake mix.

After successfully making the pumpkin bars at home, along with a pan of quick apple kuchen, neither recipe calling for extract or alcohol, I resolved never to look suspiciously at recipes beginning with a premade mix. Though I'll never tell my mother, my recent discoveries have confirmed an inkling I've had for years regarding the legendary rum bundt cake: The secret's in the box, not the bottle.

The rum bundt cake can be made in mini pans as well. This was a batch I made last year for the Greek New Year's Cake. Last year, I made the cake from scratch — truthfully, it's much better using the box!
Rum Bundt Cake

1 box yellow cake mik
1 pkg. instant vanilla pudding
½ cup rum
4 eggs
½ cup canola oil
½ cup water

Preheat the oven to 325ºF. Mix all with an electric mixer for five minutes. Grease bundt pan and lightly flour. Bake for one hour.

1 stick butter
¼ cup rum
½ cup sugar

Meanwhile, combine rum, butter and sugar together in a saucepan. Bring to a boil. When cake comes out of the oven, pour one-third of this mixture into the bottom of the cake. Let sit for 30 minutes. Turn cake out onto a cooling rack. Paint a layer of the glaze all over the cake. Let harden. Paint another layer. Repeat until all the glaze is gone.

Note: Tastes even better the second day.

Pumpkin Butter Dessert Squares

1 package yellow cake mix
½ cup butter, melted
3 large eggs
1 jar Muirhead pumpkin butter (This is the Williams Sonoma brand, but any will do. The jar was 13.5 oz.)
½ cup milk
1 tablespoon flour
¼ cup sugar
¼ cup butter, softened
1 teaspoon cinnamon.

Preheat the oven to 350ºF. Measure one cup of cake mix. Set aside. Stir remaining cake mix with the butter and one egg. Press the mixture into the bottom of a 9-by-13-inch pan. Mix the jar of pumpkin butter with the remaining two eggs and milk. Pour mixture over layer in the pan. Stir the reserved cake mix with the flour, sugar, butter and cinnamon. Mix until crumbly. Sprinkle over the top of the pumpkin layer. Bake for 35 to 40 minutes or until golden brown. Cut into two-inch squares. Serves 24.

Quick Apple Kuchen
Serves 20-24

1 box yellow cake mix
½ cup butter, softened
½ cup sweetened coconut
½ cup sugar
1 teaspoon cinnamon
3 large apples, peeled and sliced thinly
1 egg
1 cup sour cream

Preheat the oven to 350ºF. Combine first three ingredients together in a bowl. Mix with your hands or beat slowly with an electric mixer. Grease a 9-by-13-inch baking dish. Pat mixture into pan. Bake 10 minutes. Meanwhile, mix cinnamon and sugar together and toss with the apples. Remove pan from the oven and top with the apple mixture. Whisk egg and sour cream together and drizzle over the apples. Return to the oven for 30 to 35 minutes. Serve immediately.

Saturday, December 1, 2007

Daley Toffee

Well, after spending hours in the test kitchen, sifting through recipes submitted for The Bulletin's "Edible Gift Recipe Contest", I found a winner — Daley Toffee, a family recipe submitted by Laura Daley of Mount Airy. Crunchy, sweet, chocolaty, nutty, buttery, this toffee is so yummy! And addictive. Almost immediately after breaking the toffee into shards and photographing it, I brought it into the office — mostly to get it out of my sight — where the staff polished it off ... I received several e-mails that day describing the scene. I returned to work the next day to find the empty Tupperware sitting on my chair.

Before trying this recipe, I had never attempted making toffee, and now, I have no fears of candy making or of terms like "hard-ball" stage. Cooking the sugar and butter mixture until it reaches the hard-ball stage is the only tricky part of this recipe, but Laura's instructions make the process painless. Instead of relying on a thermometer, which I find never to be accurately calibrated anyway, Laura's method calls for testing the mixture by dropping a small spoonful of the mixture into a glass of cold water — it's foolproof.

The toffee, as Laura notes in the recipe, makes a great gift for the holidays. Several years ago, I purchased a case of 100 brown stationary boxes from Usbox.com. Although this large case of boxes takes up nearly half our storage space in the basement, every holiday season I am so happy to have these clear-top boxes on hand. I have packaged biscotti and chocolate truffles in them for the past two years, and now I will pack Daley Toffee in them as well. For a nice presentation, use parchment paper as a base inside the box, wrap the box with a delicate ribbon, and tie on a simple tag describing the contents of the box. My favorite tags to use for gift giving are metal rim tags, which you can find at Staples or any office supply store. They sell packs of 50 for about $10.

Daley Toffee: A Family Recipe
Laura's notes: This recipe makes a great holiday gift for those with a sweet tooth! It keeps up to 2 weeks if you put it in an airtight container.

1 C. salted butter 

1 C. sugar 

3 T. water (if tap, put through a Britta or use well or bottled) 

1 1/8 tsp. vanilla
2/3 C. ground pecans (or nut of your choice) 

4-6 oz. premium milk chococlate (bar form is easiest; can also do a dark chocolate but we think milk chocolate is best)

Directions:
1. Cook butter, sugar, water, and vanilla over medium heat stirring CONSTANTLY until golden brown — test for hard ball stage in cold water. It may smoke, but don't worry.
2. Put half to 2/3 of the nuts in the bottom of a greased 9x9 inch pan. 

3. Pour the cooked butter/sugar mixture over the nuts. 

4. Wait a few minutes and put the chocolate on top — when chocolate softens, spread evenly and sprinkle remaining nuts on top.
5. When completely cool, break into pieces. Store in airtight container. 

NOTE: You can also use an 8x13 if you'd prefer a thinner version — in which case increase nuts to 1 C.

Thursday, November 29, 2007

Best Buttermilk Biscuits

Several years ago, The Washington Post ran an article in their food section called "Building a Better Biscuit," which my grandmother saved for me, and which I have referred to many times since. The article gives some good suggestions: Don't overwork the dough; to get maximum rise, bake the biscuits soon after they are cut; and use buttermilk, fine sea salt, and a combination of baking powder and baking soda. Light, flaky and buttery, these biscuits are delectable!

The original recipe called for eight tablespoons of shortening, but I, conditioned by my mother, use all butter instead. This recipe can be adapted — I made a cashel blue cheese and chive variation for St. Patrick's Day — and the dough, unbaked, can be frozen and baked straight from the freezer. I prefer to eat these just as they are, maybe with a little butter, but they also make a nice base for poached eggs, Ben's favorite way of eating them.

Also, check out my latest post on Uwishunu.com about the most delicious tacos, made at the Sunday Headhouse Farmers' Market.

Buttermilk Biscuits
Yield = 8 biscuits

2 cups all-purpose flour
2¼ teaspoons baking powder
¼ teaspoon baking soda
¼ teaspoon fine sea salt
2 tablespoons sugar
8 tablespoons cold unsalted butter
¾ cup buttermilk plus more for brushing

Preheat the oven to 400ºF.
In a large bowl, whisk together the flour, baking powder, baking soda, salt and sugar. Cut the butter into the flour mixture and using a fork, mix the butter and flour until the butter has broken into small bits and flakes.
Pour buttermilk into flour mix. Stir with fork just until the dough comes together to form a mass — Do not over-mix. Gently gather the dough in the bowl to bring together, adding an extra tablespoon of buttermilk if necessary. Turn out onto a lightly floured work surface. Pat the dough into a ¾-inch thick circle. Using a two-inch round cutter, cut the dough into eight biscuits. Transfer to an ungreased or parchment-lined baking sheet, spacing the biscuits 2-inches apart.
Brush each biscuit lightly with buttermilk. Sprinkle a pinch of sugar over the top of each. Transfer sheet to the oven, immediately increasing the temperature to 425ºF. Bake the biscuits for 15 to 20 minutes or until golden. Remove from the oven, transfer to a wire rack to cool or serve immediately.

Sunday, November 25, 2007

Pumpkin Dinner Rolls

With Christmas less than a month away, only a few weeks remain to experiment more with pumpkin. Pumpkin ice cream is high on my list; pumpkin tiramisu, however, is falling quickly. It may not, unfortunately, happen this season.

And thanks to a free sample offered at Williams-Sonoma yesterday, I think I'll be making a batch of pumpkin dessert bars very soon. I'm usually not a sucker for those jarred products (butternut squash purée, for example, or roasted garlic tomato sauce) but the bar I sampled, made with a jar of their featured pumpkin butter (Muirhead), was particularly good, and the jars, at half price, became very attractive. The sales woman advised I buy two because no more would arrive this season. So, I did.

These dinner rolls, made simply with a can of Libby's pumpkin purée, actually have nothing to do with the WS pumpkin butter. Last week, looking for a festive recipe for Thanksgiving, however, I searched on Epicurious and found a recipe for "pumpkin nutmeg dinner rolls", which looked pretty good. Just like several of the 35 other reviewers, however, I wasn't crazy about the amount of butter suggested (12 tablespoons), so I omitted it altogether. I also left out the egg, added more salt (as many of the reviewers felt necessary), and added more "pumpkin spice" — cinnamon, cloves, nutmeg, ginger — since many of the reviewers felt the rolls lacked pumpkin flavor. Without butter and eggs, these rolls lack the richness of a classic Parker House Roll, but nonetheless remain moist and flavorful (and far more healthy).

Anyway, I never got around to making these for Thanksgiving, but I have about 20 frozen remaining in my freezer from the batch I experimented with before the holiday. Every night, I wrap one in foil and place it in the oven to thaw. They are delicious, but best the day they are made, pulled apart at the table and served with softened butter.

Pumpkin Dinner Rolls
Yield = 22 to 24

¾ cup milk, room temperature
2 teaspoons instant yeast
¼ cup sugar
15 oz. can pumpkin purée
5 cups all-purpose flour, plus more as needed
1 teaspoon cinnamon
½ teaspoon ground ginger
1/8 teaspoon ground cloves
freshly grated nutmeg to taste
1 tablespoon kosher salt
butter for greasing
1 egg

Place milk, yeast and one teaspoon of the sugar in the bowl of a standing mixer fitted with the dough hook. Let sit 15 minutes. Add remaining ingredients, except for the butter and egg, and mix on low speed for 10 minutes, adding more flour until the dough gathers around the hook and pulls away from the sides of the bowl as the hook rotates. The dough should not stick to the bottom and sides of bowl. Transfer the dough to a greased bowl, cover with plastic wrap and let rise until doubled in bulk, about two hours.

Punch down the dough, and turn out onto a lightly floured work surface. Grease two 9-inch square or circular baking pans. Portion the bread into 22 to 24 small balls (each weighing approximately 2- to 2¼-ounces). Place 10 balls in each pan, leaving space around each to rise. Cover with plastic wrap and let sit for another hour until doubled in bulk.

Preheat the oven to 400ºF. Place pans in oven for 20 minutes. Meanwhile, beat egg with 2 teaspoons water. After the 20 minutes, brush the rolls with the eggwash and return to the oven for another 5 minutes. Remove pans from oven and turn rolls out onto a cooling rack or board. Serve immediately, letting guests pull rolls apart at the table. Serve with softened butter.

Tuesday, November 20, 2007

Mache and Persimmon Salad

I cannot believe it, but today my blog celebrates its one-year birthday. Exactly one year ago today, I wrote about quince membrillo, a sweet paste commonly served with several Spanish cheeses including Manchego, Roncal, Idiazabal and Zamorano. This past week, I introduced two good friends and their family members to membrillo and the tradition of eating membrillo with sheep's milk cheeses. My friends, Emily and James, married in Cyprus July 18, celebrated their marriage stateside this past Sunday in Chapel Hill, and in the days leading up to the festivities, we enjoyed many delectable dinners together commenced with this classic combination.

While in North Carolina, Emily and I spent a good hour one day touring around a gourmet food shop, A Southern Season, where I found among many goodies a large selection of Cypress Grove cheeses (Cypress Grove makes Humbolt Fog). Being vegetarians, James and Emily try to eat cheeses specifically made without rennet, a coagulating enzyme made from the stomach of calves. Many, if not all, of Cypress Grove cheeses are made with a vegetarian rennet, including a yummy sheep's milk cheese called Lamb Chopper, which we savored with the membrillo. We actually enjoyed the fruit paste with all of the cheeses — Brie, Morbier, Tomme de Savoie — we ate this past week, but the Lamb Chopper-membrillo combination proved the best of all.

My week in North Carolina to say the least was memorable. By the end of each day, my face hurt from smiling and laughing so much — I lived with James' family for the week, a family of four funny children, two entertaining parents and two wonderful dogs. We played Scrabble and ping pong, watched Mostly Martha and Grizzly Man, took walks with Molly and Sally (the dogs), and generally just enjoyed the time spent together with good company.

On one of the first nights of my visit, we also enjoyed thin slices of Fuyu persimmons with all of the cheeses. Fuyu persimmons make a nice seasonal addition to many dishes, including salads and paninis. Available from September through December, persimmons peak in November, perfect timing for the Thanksgiving Day feast. If you're sill searching for a first course to prepare for Thursday's meal, try this salad — elegant, seasonal and delectable — a festive addition to the Thanksgiving Day table.

Mache and Persimmon Salad
Serves 4

2 small shallots
2 tablespoons champagne vinegar
2 tablespoons lemon juice
½ teaspoon Dijon mustard
¼ teaspoon sugar
½ teapoon kosher salt
1/3 cup extra-virgin olive oil
2 Fuyu persimmons
4 oz. piece of Parmigiano Reggiano
8 oz. mache
freshly ground pepper

To make the dressing, whisk the shallots, vinegar, lemon juice, mustard, sugar and salt together. Slowly drizzle in the olive oil, whisking constantly to make an emulsified dressing. Set aside.

Cut the ends off each persimmon. With a paring knife, slice off the skin, removing as little flesh as possible. Using a mandoline, cut each persimmon into thin slices. (Alternatively, slice thinly using a sharp knife.) Set aside

Using a peeler or a knife, shave thin long strips off the block of Parmigiano. Set aside.

Place greens in a bowl and toss lightly with the vinaigrette. Divide the slices of persimmon evenly among the plates. Top each with a generous handful of greens. Top with the cheese shavings. Crack pepper over each salad and serve.

Sunday, November 11, 2007

MREs

On November 10, 1775, the Second Continental Congress resolved to create the Continental Marines, a force of two battalions captained by Samuel Nicholas, a Philadelphian. Later that day, Capt. Nicholas set up his recruiting headquarters in Tun Tavern, today regarded as the birthplace of the United States Marine Corps. (A plaque marking the approximate location of Tun Tavern stands on Front Street between Walnut and Chestnut.)

Since November 10,1925, when the first formal ball took place in Philadelphia, the Marine Corps has celebrated its birthday each year with galas all over the world. All commemorations of the birthday include a reading of Order No. 47, written in 1921 by General John A. LeJeune, summarizing the history, mission and tradition of the Marine Corps. Yesterday marked the 232 birthday of the USMC.

For The Novice, Magic Ready-To-Enjoy
The Bulletin, November 9

Last Saturday, presented with the rare opportunity to help my husband prepare for a weeklong field exercise, I found myself “fieldstripping” MREs (Meals, Ready-to-Eat), the self-contained, individual rations used by the U.S. military. Fieldstripping consists of removing excess wrapping (added weight) and unneeded accessories (such as pepper, sugar, and non-dairy creamer packets), leaving the package filled with the bare necessities: snack bars, chili and beans, and M&Ms, for example.

For my services, I got paid with a package of vegetable manicotti — classic field currency — and a few other MRE components as well. While I’m sure the novelty of eating this astronaut-like food fades quickly, at the moment I’m totally intrigued.

Within seconds of filling a small pouch with a couple of tablespoons of water, the heating unit tucked inside activated, causing the bag to puff like a balloon. Hot air burst through the open end, like steam escaping a whistling teakettle’s lid, making the plastic bag hot — dangerously hot — to touch. A chemical smell, redolent of burning plastic, filled the air as the heater began warming my vegetable manicotti, squeezed inside the pouch as well in its own plastic wrapping. Following the instructions, I positioned the pouch at a slight incline and patiently waited for the magic to happen.

In the meantime, I assembled a little hors d’oeuvre — crackers and peanut butter — and opened a side dish — mango-peach applesauce. I removed the contents of the accessories pouch, setting aside the damp-proof matches, a moist towelette and two pieces of gum, opening the salt and pepper preemptively.

After 10 minutes, I removed the meal pouch and tucked in, spooning out the meal straight from the bag, attempting to keep the experience as authentic as possible. Tomato sauce, the smell reminiscent of a cafeteria lunch buffet, covered a single tube of pasta, the vegetable purée inside textured like pâté. The taste, a touch institutional as well, was fixed by splashing the entire contents of a 1/8-ounce bottle of Tabasco into the pouch.

To wash it all down, I sipped on a vanilla dairy shake, fortified with vitamin D and calcium, packing a whopping 450 calories. And while I had hoped for a packet of peanut M&Ms or Skittles, a very dense carrot pound cake satisfied my sweet tooth.

Truthfully, while I quite enjoyed my meal, I perhaps relished even more the experience, one highlighted by having to use a bottle of Tabasco standing just taller than a book of matches. If I had to subsist on MREs daily, as my husband and fellow Marines had this past week during their patrol exercise, I probably would think otherwise. Moreover, as noted by my husband, I rarely would have the opportunity to enjoy my MRE as a sit-down meal: “Chow is continuous,” he says. “You eat when you can.” Each MRE contains approximately 1,200 calories, and often one MRE, when supplemented by a few grocery store items — beef jerky and Jif-to-go — will last an entire day.

Sometimes too, my husband reminded me, limited time precludes heating. I envisioned eating cold vegetable manicotti — a hard but not impossible act. And then I considered some of the others entrées — cheese omelet with vegetables, beef ravioli, and barbeque pork ribs — a harder idea to swallow. Apparently, hot or cold, “the omelet is the worst thing ever.” But everyone has a favorite, and once the meals are distributed, a fair amount of swapping takes place: Mexican-style corn for refried beans, for example, or pumpkin pound cake for a molasses cookie.

In 1980, the MRE replaced C-rations (combat rations), which consisted of six cans including an entrée, cheese, crackers, candy, an accessory pack, a dessert and four cigarettes. A C-ration contained no heating device, though troops devised “all sorts of ingenious heating mechanisms,” says retired US Army Lieutenant Colonel David Smith. Mr. Smith, a former helicopter pilot, would drain fuel from his helicopter into a can filled with sand to create a sterno-like heater. A tank’s engine could also be used as a heater. When Mr. Smith served, rations were swapped just as they are today, and of course there were favorites back then too — beans and franks, and ham and eggs.

MREs, a vast improvement over C-rations, are remarkable inventions: They have a minimum shelf life of three years, can withstand a parachute drop from 1,250 feet, and can sustain short-term temperature extremes of -60ºF and 120ºF. And MREs continue to improve: To eliminate the need for fieldstripping, scientists have been developing a lighter weight and more calorically dense ration, First Strike Rations, allegedly well received thus far.

I asked my husband if the guys, after being in the field for several days, ever talk about the food they miss.

“All the time,” he said.

I bet they did — homemade bread, spaghetti and meatballs, roast chicken. But I shouldn’t have been so romantic: My husband disclosed the food most craved when out in the field — Five Guys Burgers and Fries. I should have known. I did just learn, after all, that McDonald’s is the only restaurant that consistently exceeds my husband’s expectations.

Sunday, November 4, 2007

Fair Trade Pecan Tart

Once a term used only to label coffee, chocolate, tea and a few other imported products, Fair Trade now describes a few domestic items as well. In honor of Fair Trade month (October), four farmers — two banana farmers from Costa Rica, a pecan farmer from Georgia, and an apple farmer from Vermont — visited several East Coast cities on a tour called the Faces Of Fair Trade. Last Tuesday, Joe Coffee Bar hosted one of the tour's stops, and I got to meet Diann Johnson (the pecan farmer), Glen Schreiter (the apple farmer) and Yocser Godoy Carranza and Carlos Vargas (the banana farmers) — the new faces of Fair Trade.

I never realized all the difficulties — isolation, for example, and low prices driven by increased market supply from countries such as China — domestic farms face, until I spoke with these farmers, especially Mr. Schreiter.

To survive in a globalized world, Mr. Schreiter had to change his game plan, and in 2000, he initiated a complete restructuring of his farm, Saxtons River Orchards, in Saxtons River, Vermont. The last straw? Mr. Scheiter couldn't even sell his apples to his neighbors, living only 10 minutes from his farm. Before 2000, Mr. Schreiter's 200-acre farm, equipped with a multi-million dollar packing facility, shipped their apples all over the world. After 1993, however, when NAFTA enabled China (the largest apple-producing country in the world) and New Zealand to sell their apples to consumers in the U.S. and all over the world, Mr. Screiter's farm began suffering.

And so, Mr. Schreiter downsized his farm to 40 acres, sold the packing facility and hooked up with an organization called Red Tomato, a nonprofit organization dedicated to connecting farmers and consumers. Red Tomato purchases 50 percent of Mr. Schreiter’s apples as well as fruits and vegetables from family farms located all along the East Coast, supplying shops throughout New England. Because few farmers’ markets operate near Saxtons River, and because the farm’s isolated location discourages many visitors, Mr. Schreiter believes his orchard could not survive without Red Tomato.

In 11 years, Red Tomato has succeeded in bringing locally grown produce to markets such as Whole Foods and Trader Joe’s. In 20 years, Equal Exchange, the oldest and largest Fair Trade for-profit organization in the country, has brought numerous Fair Trade goods — including domestic nuts and dried cranberries — to hundreds of cafés and stores, reaching over a million consumers. These organizations, realizing that domestic farmers face many of the same challenges producers in marginalized regions of the world face, have changed the face of Fair Trade. Read "The New Face of Fair Trade" in this past weekend's Bulletin to learn more about this new trend.

Also, find all of your holiday baking needs, certified Fair Trade that is, at Joe Coffee Bar. 'Tis the season for pecan pie, so plan ahead: Find a source for Fair Trade products, and purchase enough now to cover your seasonal baking needs. Equal Exchange is another good source for Fair Trade products and information. This recipe has been adapted from this month's Bon Appétit — it's delectable — not cloyingly sweet. I'm very thankful I got to see my husband this weekend, who happily took the remaining tart off my hands ... I'm looking forward to returning to my morning oat bran routine.

Diann Johnson (pecan farmer from Georgia) stands with Joe Cesa (owner of Joe Coffee Bar) at Joe Coffee Bar, where many Fair Trade products are sold:

Fair Trade Pecan Tart
Serves 5

1 stick unsalted butter, room temperature
¼ C. sugar
1 large egg yolk
pinch sea salt
1¼ C. all purpose flour
2-3 T. milk, cream or water

Beat butter and sugar using an electric mixer until smooth. Add the yolk and salt and mix again until smooth. Add the flout, mixing on low until just incorporated. Add the liquid, a tablespoon at a time, to bind. Turn dough out onto a lightly floured work surface and roll into an 11-inch round, approximately. Transfer to a 9-inch round tart pan with a removable bottom. Pierce dough all over with a fork and place in the freezer for 30 minutes.

Filling:
3 large eggs
½ C. packed brown sugar
½ C. maple syrup
½ C. dark corn syrup
¼ C. unsalted butter, melted
1½ C. coarsely chopped Fair Trade pecans, roasted and salted

Preheat the oven to 350ºF. Whisk together the eggs, sugar and syrups until well blended. Pour in the melted butter, whisking constantly. Stir in the pecans. Place the tart shell on a baking sheet and pour the filling inside. Bake tart until filling is puffed and slightly set, about 40 minutes. Transfer to a rack to cool

Thursday, November 1, 2007

Pumpkin Ravioli

Happy Belated Halloween! Well, this certainly won't be the last pumpkin recipe of the season, but it's the last for a few weeks at least. With Thanksgiving just weeks away, I have to admit I have been thinking a lot about pumpkin pie and pumpkin ice cream. Maybe that's because I have a pecan pie sitting on my counter. I need to do something about that — I had a slice for breakfast. I wish I were kidding.

Anyway, I can't pretend this recipe will take little effort. It might take all day actually. However, this recipe can be made over a few days: Roast the squash and make the filling one day; make the dough and shape the ravioli the next; cook them immediately or freeze them indefinitely. The sage brown butter sauce takes no time to prepare, so having these tasty pillows on hand (frozen) makes for a simple dinner.

And I guess they really can't be called ravioli. I'm not sure what shape they are, but they're yummy nonetheless.

Pumpkin Ravioli with Sage Brown-Butter Sauce

Filling:
1 sugar pumpkin*
olive oil
kosher salt and pepper
2 cups Parmigiano Reggiano, freshly grated
2 eggs, lightly beaten
*Winter squash such as Hubbard, red kuri or butternut make fine substitutes for the pumpkin. One sugar pumpkin yields about two cups of flesh.

Preheat the oven to 400ºF. Cut pumpkin in half, scoop out the seeds and discard. Drizzle about a teaspoon of olive oil on a baking sheet. Season inside of pumpkin with salt and place cut side down. Roast for about 45 minutes or until a knife inserts easily through the skin into the flesh. Remove from the oven and let cool completely.

Scoop out flesh and place in a bowl. Add the two cups of cheese and season with salt to taste. Mix to combine. Taste and add more salt until the mixture tastes well seasoned — there is no salt in the dough, so this is your only chance to season the ravioli. Add the eggs and mix to combine. Set aside

Dough:
3½ cups all-purpose flour, plus extra for kneading
5 large eggs lightly beaten

Mound flour in the center of a medium-sized bowl. Make a well in the center of the mound of flour. Add the eggs to the center. Using a fork, beat the eggs and begin to incorporate the flour, starting with the inner rim of the well. When the eggs are almost completely incorporated, start kneading the dough in the bowl and then transfer to a large, lightly floured wooden board and continue to knead for 10 minutes, dusting the board with additional flour as necessary. The dough should feel elastic and a little sticky. Wrap the dough in plastic wrap and allow to rest for 30 minutes at room temperature before using.

To Make:
4 T. unsalted butter
8 fresh sage leaves
¼ cup Parmigiano Reggiano

To make the ravioli, divide the dough into 4 pieces. Keep the dough covered with plastic wrap at all times. 
Lightly flour one of the pieces of dough, and shape into a rectangle about ½-inch thick.

Pass through the widest setting on a pasta machine. Fold the dough in three, like a letter, and pass through the same setting again feeding the short end in first. Repeat this step 2 times, adding flour as needed.

Without folding the dough now, repeatedly pass it through the machine rollers, reducing the space between the rollers after each pass. When it has passed through the thinnest setting, it is ready to be shaped into ravioli. (If the dough gets too long and difficult to deal with, cut it in half and feed each piece through separately until each has passed through the thinnest setting).

The dough should be just less than 6 inches wide. On the bottom half of the dough, place heaping teaspoons of the squash filling, evenly spaced every 1½ inches. Fold top half of dough over bottom half. With a knife or fluted roller, cut between each mound to create the individual raviolis. Gently pinch to seal the two dough layers together, using a tiny bit of water if necessary. Transfer to a baking sheet dusted with flour and cover with plastic wrap while you shape the remaining sections of dough.

At this point, decide how many ravioli you want to cook, and then freeze any remaining: Do not store ravioli in the refrigerator — they become a soggy mess.

To serve: Bring a large pot of water to a boil and add 1 tablespoon of salt. Place butter in a small sauté pan and heat until it bubbles. Add the sage leaves and let sizzle until crisp, about 1-2 minutes total. Turn off the heat, remove leaves with tongs and drain on a paper towel. Set aside. When water boils, add ravioli and cook until tender about 2-3 minutes (frozen ravioli also take only about 3 minutes). When ravioli are done, drain, or remove with a spider, but do not rinse under cold water. Place ravioli on a serving platter. Heat butter again until hot and begins to brown. Return the sage leaves and then spoon brown-butter over ravioli. Sprinkle with cheese. Serve immediately.

Monday, October 29, 2007

Thai Pumpkin Soup with Sweet & Salty Pumpkin Seeds

So, it finally feels like fall outside, which is great, although my apartment feels like an icebox. Phil, my lanlord, won't turn on the heat for weeks, so I guess I better get used it. My neighbor upstairs has been roasting a turkey all day just to heat up his apartment. Fortunately, I won't have to take such extreme measures — I have quarts of this spicy, pumpkin soup on hand. Although this soup hardly resembles the pumpkin soup I first became addicted to — ABP's, served in a bread bowl — pumpkin soup in any form always reminds me of college and of fun trips out to eat with roommates and teammates when the dining hall's fare just wouldn't cut it. I love pumpkin soup.

This recipe has been adapted from one I saw recently on Heidi Swanson's 101 Cookbooks.com. Almost any winter squash can replace the pumpkin, and when I make this soup again, I will use a red kuri squash or a hubbard squash, the varieties that a woman at the Fair Food Farmstand recommended I use. (While I was shopping, I was determined to use only pumpkin for my pumpkin soup.) I did, however, roast a red kuri squash next to the pumpkins to compare flavors, and ultimately found the red kuri squash to be tastier than the pumpkins. But for a recipe like this, with lots of added seasonings — Thai red curry paste, coconut milk, ginger — a more mild-tasting squash such as a pumpkin works fine.

Next pumpkin recipe: Pumpkin Ravioli with Crispy Sage and Brown Butter Sauce ... so yummy!

Thai-Spiced Pumpkin Soup
Yield = 2½ quarts

2 sugar pumpkins*, about 2 lbs. each
olive oil
kosher salt
1 tablespoon butter
1 medium onion, roughly chopped diced
1-inch knob ginger, peeled and roughly chopped
2 cloves garlic
2 tablespoons Thai red curry paste
1 can unsweetened coconut milk, (13.5 oz.)
cilantro, optional
spiced pumpkin seeds, optional
*Winter squash such as Hubbard, red kuri or butternut make fine substitutes for the pumpkin. Two sugar pumpkins yield about four cups of flesh.

Preheat the oven to 400ºF. Cut each pumpkin in half, scoop out the seeds and discard. Drizzle about a teaspoon of olive oil on a baking sheet. Season inside of pumpkins with salt and place cut side down. Roast for about 45 minutes or until a knife inserts easily through the skin into the flesh. Remove from the oven and let cool completely.

Meanwhile in a medium-sized saucepan, melt the butter. Add the onion and ginger and cook over medium heat until translucent and tender, about five to 10 minutes. Season with salt to taste. Add the garlic and sauté for a minute longer. Add four cups water, one tablespoon of the curry paste, the coconut milk and one teaspoon of salt, and bring to a boil.

When the pumpkin has cooled, scoop out the flesh and add to the pot (there should be about four cups of flesh). Return mixture to a boil and let simmer 10 minutes. Using an emersion blender, purée the mixture until smooth. (Alternatively, transfer to a blender or food processor and blend until smooth.) Taste mixture, adding more salt if necessary and the remaining tablespoon of curry paste if desired. Return to stove to heat through if serving immediately, or let cool completely before storing. Serve with chopped cilantro and spiced pumpkin seeds.

Sweet & Salty Pumpkin Seeds
Yield = 1 cup

¼ cup sugar
½ teaspoon kosher salt
2 teaspoons canola oil
1 cup pumpkin seeds

Combine sugar and salt in a large bowl. Set aside. Pour oil into a nonstick sauté pan and turn heat to high. Add nuts. Sauté until nuts begin to pop violently. After three to four minutes, when half of the nuts have turned golden brown, turn off the heat, transfer nuts to the bowl with the sugar-salt mix, and toss to coat. Transfer nuts to a fine mesh strainer and shake excess any coating off. Line a sheet pan with foil and spread nuts across it to cool completely. Store in an air-tight container.

Saturday, October 27, 2007

Pumpkin Cupcakes

Oh man, Old School is too funny. So it's Saturday night, I started watching the Red Sox game, but tired quickly — sorry Nick (and all those other die-hard fans out there) for my lack of spirit, but seriously, it's already 6-0. Anyway, after flipping through the channels, I came across Old School, a movie I still have not seen start to finish but that I feel I've seen 100 times because my lacrosse team quoted it incessantly when it came out in 2003. Anyway, I've been laughing out loud ... my poor grandmother ... I'm probably waking her up.

What else, let's see, I just had the most delicious moussaka for dinner, followed by Balzano apple cake for dessert, two treats left for my grandmother by my auntie. I must learn that moussaka recipe — it is unbelievable!

Oh and these cupcakes, the third in a series of pumpkin recipes, are really a seasonal treat — they'll please everyone: On Monday, fearing if I left them in my reach they would disappear as quickly as last week's apple cake, I dropped the remaining 11 of this batch of 12 off at The Bulletin's office, and they were a big hit. Unfortunately, I still have about a quart of the cream cheese frosting left in my refrigerator at home ... I really hope I don't return to Philadelphia with an empty stomach.

Next pumpkin recipe: Thai Pumpkin Soup with Sweet and Salty Pumpkin Seeds

Pumpkin Cupcakes with Cream Cheese Frosting
Yield = 12 cupcakes

1½ cups flour
1 teaspoon baking powder
1 cup pumpkin purée
1/3 cup vegetable oil
2 large eggs
2 teaspoons pumpkin pie spice
1¼ cups sugar
½ teaspoon baking soda
½ teaspoon kosher salt

frosting and decorative garnishes (purchased at Fante’s) if desired

Preheat the oven to 350ºF. Whisk together the flour and baking powder. In a separate bowl, whisk the remaining ingredients. Combine the wet and dry ingredients and mix only until just combined. Place paper liners in muffin pan or coat with cooking spray. Fill each cup only three-quarters full. Bake 20 to 25 minutes or until an inserted knife comes out clean. Let cool completely before frosting.

Cream Cheese Frosting

8 oz. cream cheese, room temperature
8 oz. butter, room temperature
1 teaspoon vanilla extract
2 cups confectioners’ sugar

Beat all with an electric mixture until smooth. Chill until ready to serve.