Thursday, May 29, 2008

I'm So Green ...

... and fashionable! I feel so fortunate to have friends who look out for me not only on the green-food front, but also on the green-fashion front. Gone are the days when people ask me if I've lost my suitcase, which, sadly, happened once during college. From a very reliable source residing in NYC, I learned that this bag is all the rage in the style world. A quick look at all of the celebrities sporting this eco-friendly tote verified her claim. Thanks lis!

What's more? For every bag purchased, a tree is planted. You can even become a fan of mybagcares on Facebook.

Check out MyBagCares.com for more info.

Wednesday, May 28, 2008

Breakfast Pizza For Dinner

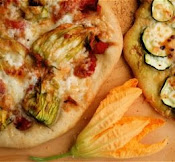
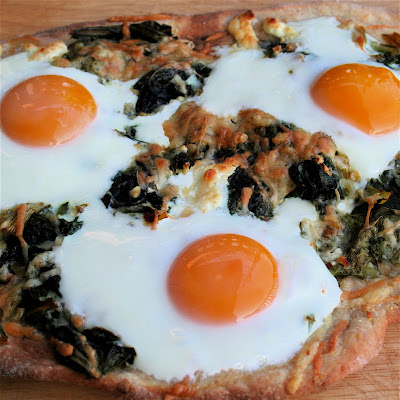
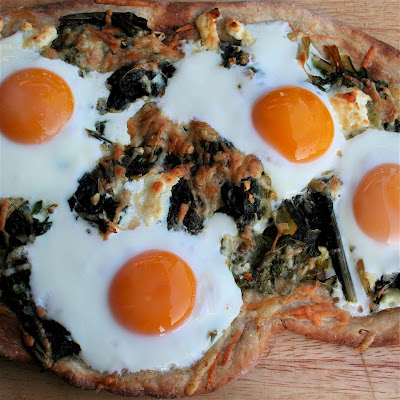
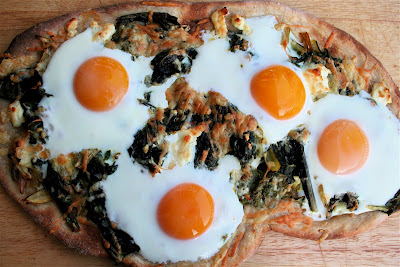
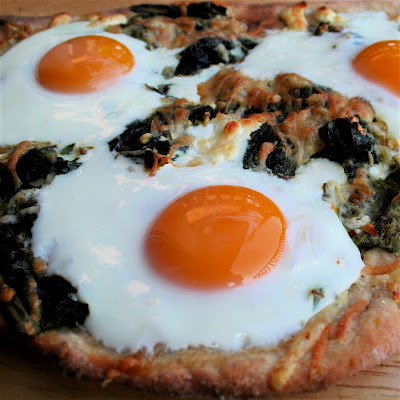
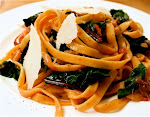
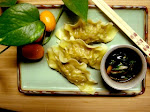
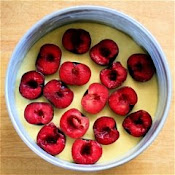
Oh, how I wish I could take credit for this ingenious creation. Alas, I cannot. A very good friend of mine, after observing my egg obsession, kindly directed me to this 
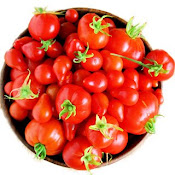
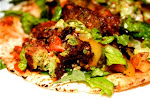
Apartment Therapy site, offering me yet another way to enjoy my beloved eggs. (Thanks, Amanda!) The eggs, cracked atop the pizza during the last few minutes of baking, retain a runny yolk, which, when cracked, ooze into the crust and toppings — sautéed Swiss chard and cheese, in this case — making each bite unbelievably tasty. This combination was particularly yummy, but I suspect these eggs would enhance various topping combinations, from sausage and peppers to tomato and basil to ricotta and spinach — oh, the possibilities are endless.

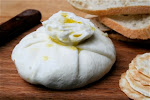
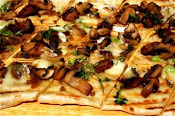
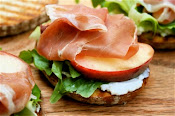
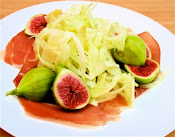
Not too long ago, I made a flatbread with brie, prosciutto and watercress — a recipe I spotted in a recently published cookbook Blue Eggs, Yellow Tomatoes. Well, I must confess that the dough recipe I have enclosed below is far superior. Adapted from Todd English's The Figs Table, this wet dough — admittedly a little difficult to work with — yields a thin and crispy crust. I'm not sure why I bother experimenting with any other recipe — my family (my mother) has been making the Figs' pizza dough for years with great success.

One note: Unless you have a very powerful food processor, don't use one. I burned out the engine on mine making this recipe and had to finish the kneading by hand. Use a stand mixer if you have one or knead by hand from the beginning.

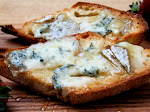
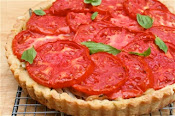
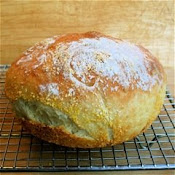
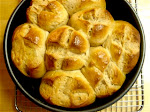
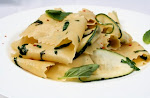
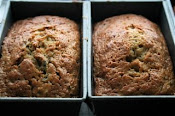
This recipe makes a very wet pizza dough. Once baked, however, the dough becomes a light, thin, crisp crust. My family has been using this recipe for years, and one of our favorite topping combinations includes caramelized onions, grapes, blue cheese, Parmigiano Reggiano and fresh basil. This dough freezes well, too: After the two-hour rise, punch it down, wrap it in plastic and throw in the freezer. When ready to use it, let the dough sit at room temperature for a few hours prior to cooking.

Pizza Dough
Adapted from Todd English’s The Figs Table
Makes 4 8- to 10-inch pizzas (Serves 1 to 2 people per pizza)

¼ cup whole wheat flour
3½ cups all-purpose flour, plus additional for rolling
2 teaspoons kosher salt
1 2/3 cups lukewarm water
2 teaspoons sugar
2 teaspoons active-dry yeast
2 teaspoons olive oil

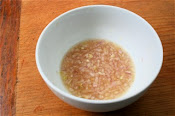
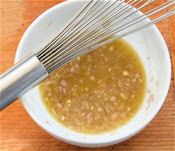
1. Place the flours and salt in a mixer fitted with a dough hook. Combine the water, sugar and yeast in a small bowl and let sit for five minutes until the mixture bubbles slightly. Add the olive oil and stir. With the mixer on low, gradually add the oil-water mixture into the bowl. Knead until the dough is firm and smooth, about 10 minutes. The dough will be very wet and sort of difficult to work with. I liberally coat my hands with flour before attempting to remove it.

2. Divide the dough into four balls, about 7½ ounces each. Line two cookie sheets with parchment paper. (Be sure to oil the parchment paper.) Place two balls on a sheet. Lightly rub the balls with olive oil or lightly coat with cooking spray, then cover loosely with plastic wrap. The dough is very sticky and wet, so, be sure to coat the balls or the plastic with oil. Let the balls rise in a warm spot until they have doubled in bulk, about two hours.

3. To roll out the dough: Dab your fingers in flour and then place one ball on a generously floured work surface. Press down in the center with the tips of your fingers, spreading the dough with your hand. When the dough has doubled in width, use a floured rolling pin and roll out until it is very thin, like flatbread. The outer portion should be a little thicker than the inner portion.
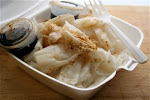
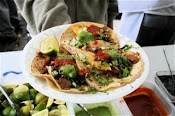
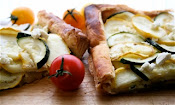
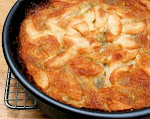
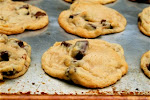
Breakfast Pizza: Sorry for these undetailed instructions, but I really just threw this together.
Serves 2

cornmeal

olive oil
Swiss chard, washed, stems diced, leaves roughly chopped
garlic, minced
kosher salt
crushed red pepper flakes
Grated Parmigiano Reggiano and cheddar and crumbled goat cheese (use any grated cheese you have on hand)
4 eggs

1. Preheat the oven to 500ºF. Follow the instructions above for rolling out the dough. Sprinkle some cornmeal on a baking sheet and transfer the dough to the baking sheet.

2. Meanwhile, sauté the Swiss chard stems in the oil until slightly tender. Increase the heat to high, add the greens, season with salt, red pepper flakes and garlic. Rearrange the greens with tongs until nicely wilted. Turn off the heat and set aside.

3. Top pizza with a thin layer of greens and cover with the grated cheese. Place in the oven for about eight minutes, or until about three minutes away from being done. Remove from the oven and crack the eggs over the pizza. Return to the oven, cooking just until the whites are set and the yolks are slightly runny.

4. Serve immediately.

Friday, May 23, 2008

Garden Update

Recall the garden I (Ben) planted? Well, in just one month, look how it's progressed!

The tomato plants are growing like mad. So is the summer squash. If you haven't planted a garden yet this spring, it's not too late. Even easier than the cinder-block method I used for my main garden, is the "pot" method, which requires two steps: buying a pot and filling it with potting soil. Seriously, the four plants I have in pots — summer squash, zucchini, butternut squash and melon — seem to grow inches every day.

Other notes: We have already eaten a lot of the Swiss chard and have watched it grow back. We've eaten all of the arugula and are hoping it grows back. We use the herbs often. One of our pepper plants hasn't budged since we put it in the ground. And our neighbor's cat thinks our garden is an enormous kitty litter, but so far hasn't caused any damage.

Blossoms from a summer squash plant:


Not quite sure what this is. It's either melon or butternut squash:


Garden as a whole:

Tuesday, May 20, 2008

I Love David Archuleta

... and so does Ben. Seriously, Ben was practically moved to tears by tonight's performance.

I've been having some computer trouble these past fews days, but I wanted to post my fifth and final muffin finding. I spotted these tri-berry muffins not too long ago on RecipeGirl's blog. A Barefoot Contessa Recipe, these muffins are moist, sweet, and a yummy yummy treat! I used all frozen berries and they came out beautifully. 

Tri-Berry Muffins
Adapted from The Barefoot Contessa via RecipeGirl
Yield = 12

1½ C. all-purpose flour
1½ tsp. baking powder
¼ tsp. baking soda
¼ tsp. kosher salt
1 tsp. ground cinnamon
¾ C. granulated sugar

¾ C. milk
1 egg, lightly beaten
1 stick unsalted butter, melted
1 tsp. vanilla extract

1 C. mixed berries, fresh or frozen. A mixture of frozen blueberries and raspberries works well. If using strawberries, fresh is better than frozen. Be sure to dice.

1. Preheat the oven to 375°F. Place liners in muffin tin.

2. Sift flour, baking powder, baking soda, salt, cinnamon and sugar together in a large bowl. Stir with a whisk to combine.

3. In another bowl, combine the milk, eggs, butter and vanilla.

4. Add the wet ingredients to the dry, and stir until just combined. There might be some lumps but don't overmix the batter. Fold in the blueberries, raspberries and strawberries.

5. Spoon batter into the muffin cups. Bake for 20 to 25 minutes, until a cake tester comes out clean and the tops are nicely browned.

Thursday, May 15, 2008

Muffins Round 4: Vegan-Blueberry

I believe this is my first attempt to bake anything vegan. I was surprised at how moist these muffins tasted but if I ever make them again — which I hope I do because I now have opened bags of tapioca flour, xanthum gum and potato flour in my pantry as well as a gallon of rice milk in my fridge — I would cut the amount of brown sugar. These were just a touch too sweet. I'm not sure how cutting the brown sugar will affect the texture of the muffin, but I think there's room for improvement in this recipe.

This recipe has been adapted from the Gluten-Free Goddess' recipe for Brown Sugar Blueberry Muffins but uses a different recipe for the egg replacement.

Vegan-Blueberry Muffins
Yield = 12 to14

For the batter:
1¼ C. rice flour, white or brown
½ C. tapioca flour
½ C. buckwheat flour

1¼ C. light brown sugar

½ tsp. kosher salt

1 tsp. baking soda

2 tsp. baking powder 

½ tsp. xanthan gum

1 tsp. cinnamon

½ tsp. nutmeg

¼ tsp. allspice


½ C. organic applesauce

2 T. rice milk
½ C. canola oil

1½ tsp. vanilla extract

For the egg replacement:
1 T. tapioca flour
1 T. potato flour
¼ tsp. baking powder
1/8 tsp. xanthum gum
½ C. water
2 tsp. canola oil

1 heaping C. blueberries, fresh or frozen

1. Preheat the oven to 375ºF. Place liners in muffin tin.

2. Whisk together all the ingredients for the batter until well combined.

3. In a separate bowl, whisk the ingredients for the egg replacement until frothy. Add to the batter and mix until well combined.

4. Fold in the blueberries.

5. Spoon batter into muffin cups, place in the center of the oven and bake for 20 to 25 minutes. Cool on a wire rack very briefly.

For future snacking, wrap the muffins individually in foil, then freeze in a big zip-freezer bag. Re-heat in the oven for 15 to 20 minutes at 400ºF.


Wednesday, May 14, 2008

Round 3: Gluten-Free Blueberry Muffins

Whenever anyone asks me for a gluten-free recipe, I point them to two places: Gluten-Free Girl and Gluten-Free Goddess, two blogs with wonderful recipes and resources for celiacs. This recipe has been adapted from Gluten-Free Girl's recipe for Blueberry Muffins with Lemon Zest. I only difference is that cornmeal (another gluten-free ingredient) has been substituted for the sorghum flour because I couldn't find sorghum at the store. Though I'm not an experienced gluten-free cook, I imagine many gluten-free flours could be used in this recipe.

Here are a few facts about Celiac Disease:

• The symptoms of Celiac disease mimic many well-known illnesses and vary from mental manifestations such as irritability and depression to physical debilitations such as fatigue, weight loss, bloating, joint pain, delayed growth and itchy skin to more obscure indicators such as infertility and weakened bone density.

• Common misdiagnoses include irritable bowel syndrome, Crohn's disease, anemia, ulcerative colitis, anorexia and chronic fatigue syndrome.

• Researchers believed the disease afflicted only one in every 2,500 people as recently as 13 years ago. Today, that number has increased to one in 133, amounting to 3 million Americans.

• Celiac disease (also known as celiac sprue, nontropical sprue and gluten-sensitive enteropathy) is an inherited, autoimmune digestive disease triggered by the consumption of gluten, a protein found in wheat, barley and rye. When celiacs eat food containing gluten, their immune system reacts by attacking their small intestine, damaging its ability to absorb nutrients from food. And when the body is denied essential vitamins, nutrients and calories, fatal health complications including cancer, osteoporosis, anemia and seizures can develop.

For a little more info, read: For Celiacs, Diet Can Reclaim Life

Click here for wonderful gluten-free brownie and focaccia recipes.

Good Resources:
National Foundation For Celiac Awareness (NFCA)
Celiac Disease Foundation
Celiac Sprue Association
Gluten Intolerance Group

Gluten-Free Muffins
Adapted from the blog Gluten-Free Girl
Yield = 18

10 T. unsalted butter, room temperature
1 C. white sugar

2 large eggs

1 tsp. vanilla extract
2 tsp. lemon zest

1 C. cornmeal

1 C. rice flour, white or brown
1 C. tapioca flour 

1½ tsp. baking powder
½ tsp. baking soda
½ tsp. kosher salt 

1½ C. plain yogurt

1 C. blueberries, fresh or frozen


1. Preheat the oven to 375ºF.

2. In a stand mixer fitted with the paddle attachment, cream the butter and sugar together until fluffy. Add the eggs one at a time, mixing after each addition. Add the vanilla and the zest and mix until blended.

3. In a separate bowl, combine the cornmeal, flours, baking powder, baking soda and salt.

4. Add half of the dry ingredients to the stand mixer and stir to combine. Add half of the yogurt and stir to combine. Repeat until all of the dry ingredients and yogurt have been added.

5. Fold in the blueberries.

6. Place liners in a muffin tin. Fill each two-thirds full with batter. Bake for about 30 minutes, or until the tops have browned and started to harden.

Tuesday, May 13, 2008

Round 2: Low-Carb Cottage Cheese Muffins with Cheddar & Scallions

These are fun. Unlike any muffin I've ever tasted. Textured like a cross between a souffle and a quiche. Savory. Can be flavored in any way: with ham, bacon, herbs, peppers, spinach, whatever. A nice, portable breakfast especially for those who eat on the run. Recipe can be halved. Batter can be baked in ramekins. If using paper liners, be sure to coat with nonstick spray. Adapted from a low-carb muffin recipe posted on the blog Kalyn's Kitchen via the blog 101 Cookbooks. So yummy!

(Note: The reason for this muffin mania: For Every Mom, A Muffin To Match, The Bulletin, May 9, 2008)

Cottage Cheese Muffins with Scallions & Cheddar
Adapted from 101 Cookbooks
Yield = 6 to 8

2/3 C. cottage cheese
¼ C. grated Parmigiano Reggiano
¼ C. whole wheat flour
2/3 C. almond flour
1 tsp. baking powder
¼ tsp. kosher salt
4 eggs, beaten
3 T. water
½ C. sharp cheddar
2 T. sliced scallions
Other ideas: diced ham or bacon; sun-dried tomatoes; herbs: basil, tarragon, chives, thyme, parsley

1. Preheat oven to 400ºF.

2. In a large mixing bowl, combine cheeses, flours, baking powder, salt, eggs, and water. Mix until well combined, then fold in the cheddar and scallions.

3. Line a muffin pan with six to eight liners*. Coat lightly with cooking spray. Divide batter between the muffin cups. Bake muffins 20-25 minutes or until lightly browned on top and set. *Alternatively, line ramekins with muffin cups, place on a sheet pan and bake.

Monday, May 12, 2008

Muffins Part 1: Double Chocolate

OK, as mentioned yesterday, this will be the first of five muffin posts. I have no favorites and will post them in no particular order — they are all so different, ranging from low-carb to vegan to gluten-free, and I love them all for different reasons.

Now, normally, when I find myself at a coffee shop for breakfast, pastries such as double chocolate muffins do not tempt me. I usually go for the scone or the bagel or the deceivingly healthy-looking bran muffin. But these chocolate muffins somehow strike a nice balance: They are rich and chocolaty in flavor but light and airy in texture. They are perfectly sweet and oddly and unexpectedly minty tasting. I checked the cocoa powder to make sure I hadn't used a mint-flavored variety (which I don't think even exists) and I checked the chocolate chips for the same reason. I do have a theory, however. The chocolate chips traveled across the country in the same vessel as a bottle of peppermint extract. These two ingredients then lived together in complete darkness for three months. I think they may have bonded. (It's crazy — the bottle of peppermint extract hasn't even been opened.)

Also, I hate to sound like Ina Garten, but I did use a "good" brand of cocoa, courtesy of cousin Jay who brought me some Dagoba cocoa powder from a trade show he recently worked at. I'm not sure if a "good" cocoa powder makes the difference, but I don't want to overlook it either.

These are so yummy. Enjoy!


Double Chocolate Muffins
Yield = 12 to 14

1¾ C. all-purpose flour
1 C. sugar
½ C. unsweetened cocoa powder
¼ tsp. baking soda
2 tsp. baking powder
½ tsp. kosher salt
2 large eggs
1 C. milk
½ tsp. vanilla extract (or a ¼ tsp. peppermint extract)
½ C. butter, melted
½ C. mini chocolate chips

1. Preheat the oven to 350ºF. Place liners in muffin pan or coat pan with nonstick spray.

2. Combine flour, sugar, cocoa, baking soda, baking powder and salt in a large mixing bowl. In a separate bowl, whisk eggs, milk, vanilla and butter until combined. Combine wet and dry ingredients until just blended. Fold in chocolate chips.

3. Spoon batter into liners and bake for 18 to 20 minutes.

4. Let cool briefly in pan, then transfer to cooling rack.

Saturday, May 10, 2008

Delaney's Cannelloni & Orange Coast Magazine

Now, before I begin five days in a row of muffin posts, I must first describe my latest discovery at Delaney's Culinary Fresh, (you know, the fresh pasta I am obsessed with.) I'm not sure how long owner Jordan Stone has been selling cannelloni, but last Sunday, after spotting them at the farmers' market, I couldn't resist breaking my red pepper-linguini routine. And when these spinach- and ricotta-stuffed cigars emerged from the oven bubbling beneath a layer of crispy parmesan cheese, I wasn't sorry I had.

DCF products make dinner preparations so simple: Preheat the oven to 375ºF. Spread some tomato sauce on the bottom of a baking dish and lay the cannelloni on top. Spread a little more sauce on top of the cannelloni and place them in the oven. After 20 minutes, add a couple handfuls of freshly grated Parmigiano Reggiano. A sprinkling of chopped parsley at the very end adds a nice, though uncritical, touch of freshness. Serve with bread and a little salad.

Unlike most filled pasta dishes, particularly the cheese-laden ready-made varieties, these cannelloni taste light — or as light as a cannelloni can taste. And the women at DCF have somehow accomplished this without sacrificing any flavor: From the thin, semolina dough to the subtly flavored spinach filling, these cannelloni are a real treat. Ben made a really good point, too, noting that "The cannelloni aren't sloppy." Filled pastas such as manicotti and lasagna — think school lunch line — so often are overly cheesy and watery and heavy. These are not.

Also, just a quick note on parsley. The trend these days, it seems, is to use Italian parsley — the flat leaf variety. I've gotten so used to using it, I forget to even consider curly parsley. The other day, however, I remembered some words of wisdom from my grandmother. Sometime last year, my grandmother started buying curly parsley again, preferring its flavor to Italian. And I think, (correct me if I'm wrong, Gramma), an episode of the Barefoot Contessa on the Food Network inspired her to make the switch. In any case, the other day at Trader Joe's, all that remained was a carton of the curly variety, and so, I bought it — it was delectable. Very flavorful. I used it all week, even in a recipe for cottage cheese muffins which I cannot wait to share with you. So, I guess all I'm saying is not to overlook curly parsley if you cannot find Italian.

And lastly, if you are interested, check out this article, "Linguini Lust," in Orange Coast Magazine. The article is not on-line, so you'll have to click on the image at left to read it. Though you may feel you've heard enough from me about Delaney's Culinary Fresh, here you'll get a little more insight into Stone's background. She began her fresh pasta business by making compound-butters and selling them in front of her local grocery store. As a single mother, she spent many years working two jobs to support her three daughters — it's quite an inspiring story.

Now, while a purchased tomato sauce will work just fine for these cannelloni, a homemade sauce can be prepared with little effort: Sauté an onion in a mixture of oil and butter over medium heat until translucent, about five to 10 minutes. Add a jar of peeled, crushed tomatoes such as San Marzano or Pomi brand. Season with salt and pepper and let simmer 20 minutes over low heat. Add a pinch of crushed red pepper flakes or oregano or any seasonings you like. Taste and add a pinch of sugar if necessary.


Thursday, May 8, 2008

Rosemary-Goat's Milk Gelato & The Chino Vegetable Stand

Sometimes I like to test my husband's taste buds. Here's an example. The other night, Ben was pacing around the kitchen after dinner looking for some more food. "Can I make you a bowl of cereal?" I asked. Sure, he said. So, I filled up a bowl with a mixture of Kashi Heart To Heart and Barbara's Shredded Oats, sliced in a banana and poured in the milk ... goat's milk that is. I gave Ben the bowl then returned to the couch.

I could hardly contain myself. "Do you notice anything different?" I asked.

"Yeah. What am I eating?" Ben asked.

"Goat's milk," I said. "Do you like it?"

"I prefer cow's milk," he said. "In my cereal that is." Ben is such a good sport.

Now, the reason I had goat's milk on hand is because I had been craving Capogiro Gelato, particularly the rosemary-goat's milk flavor. Since I haven't found a gelato shop near me yet, I decided to make my own. I picked up a quart of goat's milk at Henry's Market one day and set to work. I followed a recipe I like for vanilla gelato in Mario Batali's Molto Italiano cookbook. I steeped the rosemary for about 30 minutes, tempered the egg yolks, chilled the mixture and then froze it in my ice cream maker.

The result? The gelato had a very nice texture, and the flavor was, well, shall I say, unique? The rosemary was a little too powerful. I've written the recipe below with a much shorter steep time.

I don't know how Capogiro does it, but one trait I love about their rosemary-goat's milk gelato is its pure white color. Some of their gelatos are made with eggs, some are not, and they'll tell you if you ask. I forget if their rosemary gelato contains eggs or not. Also, I have asked many times how gelato differs from ice cream, and I never seem to remember the answer, but this is what is coming to mind: Gelato is churned more slowly. Gelato is more intensely flavored. And, according to Mario Batali's cookbook, gelato is lower in fat.

I should note, too, that the rosemary I used came from the Vegetable Shop at the Chino family farm in Rancho Santa Fe. I have heard so much about this stand from friends living in Del Mar, and over the weekend, I finally got to see it. I picked up the most beautiful produce: two bunches of mizuna; two bunches of Swiss chard; two bulbs of green garlic; and a pint of the strawberries pictured above and below, which lasted about five minutes in my apartment. They were so sweet! They sort of tasted like grapes. The man at the stand called them "French" strawberries. Yum.

Oh, and next week, stay tuned, I have five more muffin recipes to share with you. I'm seriously up to my eyeballs in muffins.

Rosemary-Goat’s Milk Gelato
Adapted From Mario Batali’s recipe for vanilla gelato in Molto Italiano (Harper Collins, 2005)
Yield = 1½ pints

2 cups goat’s milk
½ cup sugar
one sprig rosemary
kosher salt
7 egg yolks

1. In a medium-sized, heavy-bottomed saucepan, heat the milk with ¼ cup of the sugar, the rosemary and a pinch of salt. Bring the mixture just to a boil, making sure the sugar has dissolved. Turn off the heat, remove the rosemary and discard.

2. Meanwhile whisk the yolks with the remaining sugar until the mixture is pale yellow. Ladle some of the milk into the eggs whisking constantly. Repeat until half of the milk has been added to the eggs. Return the egg-milk mixture to the saucepan and cook over medium heat, whisking constantly. DO NOT BOIL. When the mixture begins to thicken and coats the back of a spoon, remove pan from heat and strain into a shallow vessel. Do not second-guess yourself: When the mixture thickens, it is done. (I returned mine to the heat and it curdled. Too stubborn to start over, I strained the mixture through a very-fine chinois. It seemed to work — the gelato did not taste eggy at all. Try to avoid having to do this, however.)

3. Place vessel in the refrigerator until cold.

4. Freeze in an ice cream maker according to the manufacturer’s instructions. Eat immediately or freeze until ready to serve. Once frozen, let sit at room temperature until ready to serve.

Monday, May 5, 2008

Philadelphia Farmers' Markets

Hi again. Just a quick reminder to all my Philly friends that farmers' market season officially commenced this past weekend with the opening of the Sunday Headhouse market. Headhouse is where you can find my favorite Birchrun Hills Blue cheese, the best tacos and wonderful produce.


And tomorrow, Tuesday, the market I frequented most re-opens at 2:00 p.m. at South and Passyunk. Wish I could be there!

Here is a schedule of all 44 farmers' markets operating in the Philadelphia area this season.

To read more about the 2008 farmers' market season read Market Fever in The Bulletin, May 2, 2008 or visit the Farm To City and The Food Trust Web sites.

Saturday, May 3, 2008

Farro Risotto with Asparagus & Very Large Pictures

My mother has been telling me about this asparagus risotto for a little over a year now. She adapted the recipe from one printed in Gourmet last spring as well as from one in the New York Times submitted by Mark Bittman via Mario Batali. The recipe calls for puréeing about a pound of cooked asparagus and stirring it into the risotto in the last five minutes of cooking. The remaining pound or so of asparagus tips and stems are also added toward the end — the heat of the risotto slowly cooks them. The purée allows every bite of this risotto to burst with the taste of asparagus and the tips provide a nice crunch as well as additional flavor. Farro or barley are two healthier alternatives to the traditional Arborio rice, but many grains, as long as they are long-cooking grains, will work equally well.

This risotto is best eaten the day it is made mostly because the asparagus pieces deteriorate a little bit after a day or two. That said, Ben raved about this dish even two days later. On Friday, after being in the field for a week, Ben shoveled down two bowls, wiping his dish clean with a nice hunk of bread. Then he turned to me and said, "You should blog about this." Sometimes he knows just what to say.

Now, Let me explain the very large photos. So, I import photos from my camera into iPhoto. In iPhoto, I adjust the photo as necessary usually sharpening and cropping. When I crop the photo, the little icon of the picture becomes bigger, and so when I import the photo to my blog, a bigger image appears.

I don't know how to make the little icon bigger without cropping. And sometimes, I don't want to crop anything out of the photo, but I do anyway, just so I can upload a larger image. Now, if I mess around with some of the numbers in html I can get ridiculously large photos, such as the one pictured above of the risotto, that don't even fit in the allotted space, or really small pictures that aren't much fun. Does anyone know a better way to make the pictures bigger?

Barley Risotto with Asparagus and Hazelnuts
Yield: 3 to 4 servings

2 lbs. asparagus, peeled, trimmed and cut into one-inch-long pieces, tips reserved
4 to 6 C. chicken or vegetable stock (homemade or low-sodium)
2 T. extra virgin olive oil
3 T. butter, room temperature
½ medium onion, diced very finely
1¼ C. semi-pearled farro*
½ C. dry white wine
1 heaping tsp. kosher salt
¾ C. grated Parmigiano Reggiano
½ C. toasted, coarsely crushed hazelnuts

¼ C. finely chopped parsley
*Purchase at Italian specialty shops (Hulled barley or Arborio rice can be substituted)


1. Bring a pot of water to a boil. Add half the asparagus stalks (not the tips) and cook until quite soft, at least five minutes. Rinse quickly under cold water or put in ice water. Put cooked asparagus in a blender or food processor and add ¼ cup water. Purée adding more water one tablespoon at a time if necessary. Set aside.

2. Put stock in a medium saucepan over low heat. Put oil and 1 tablespoon butter in a large, deep skillet or pot over medium heat. When it is hot, add onion, stirring occasionally until it softens, 3 to 5 minutes.

3. Add farro and cook, stirring occasionally, until it is glossy, about 2 to 3 minutes. Add white wine, stir, and let liquid bubble away. Add the salt. Add warmed stock, ½ cup or so at a time, stirring occasionally. Each time stock has just about evaporated, add more.

4. After about 15 minutes, add remaining asparagus pieces and tips, continuing to add stock when necessary. After 5 minutes, begin tasting the risotto. You want the grains to be tender but with a bit of crunch; it could take as long as 30 minutes total to reach this stage. When it does, stir in ½ cup asparagus purée. Remove skillet from heat, add cheese, hazelnuts, parsley and remaining butter, and stir briskly. Taste and adjust seasoning if necessary. Serve immediately.

Thursday, May 1, 2008

Fava Bean and Pecorino Salad

I cook fava beans once a year. When I spot the first of the season at the market, I fill up a bag, take them home and set to work, peeling, blanching and then peeling again. I open Alice Waters' Chez Panisse Vegetables and weigh my options: purée them and stir them into risotto or eat them raw with prosciutto and Pecorino. I'm sorry, but anything that calls for two peelings is not going into my blender. And so, I eat the fava beans raw, tossed with olive oil and lemon juice and mixed with parmesan or Pecorino. And I don't share them with anyone because the two pounds I peeled yields only enough for a small snack. But they are so good. Definitely worth the double peeling. At least once a year.

OK, so I'm being a little dramatic, but seriously, fava beans are a lot of work. I will cook them more than once this year, and I will share them, but I will cook them only at opportune times, like when I invite friends over who have small children with little fingers who will work swiftly.

With this salad, I like the Pecorino to be in big chunks. I'm a big fan of shaving cheese with a peeler or with a sharp knife, but with this salad I use a different technique: I stick the point of a large, sharp knife directly into the block of Pecorino and twist. It breaks into nice, flaky shards. Parley is a nice addition to this salad, but not critical. And a finely chopped shallot or red onion is also a nice touch.

Fava Bean and Pecorino Salad
Serves 4

2 to 3 lbs. fresh fava beans, shelled
kosher salt
freshly ground black pepper
4 oz. Pecorino Romano
extra-virgin olive oil
1 to 2 lemons
finely chopped parsley


1. Bring a large pot of water to a boil. Add the fava beans and cook for one minute. Drain, then plunge the beans into an ice bath and let cool. Drain again. Peel the beans and place into a mixing bowl.

2. Season with salt and pepper to taste. Break the Pecorino into big chunks and sprinkle them into the bowl.

3. Drizzle olive oil over the mixture and toss. Sprinkle with lemon juice to taste. Add the parsley, toss again, and serve.